Home/office renewable energy
A case study
The Outdoor Brickoven
|
Home/office renewable energy A case study The Outdoor Brickoven |
|
|
In winter we cook mainly on our wood stove, but in summer we've had to rely on a propane range. I don't like using propane in the first place, but even worse is the fact that our particular propane oven has a big electric igniter that stays on when the oven is turned on. So summer baking has meant both fossil fuel use and an unwelcome electrical load. Then a couple of years ago a New York city publisher called me to check firewood terminology for an Australian book on brick ovens they intended to publish for the North American market. The publisher reciprocated by sending me a copy of Your Brick Oven by Russell Jeavons. It turned out to be a gem of a little book and it prompted me to build one. |
Why
are we investing in renewables? |
|
The first thing I did was remove the sod from a patch of yard and pour a
circular concrete pad 50" in diameter and about 5" thick.
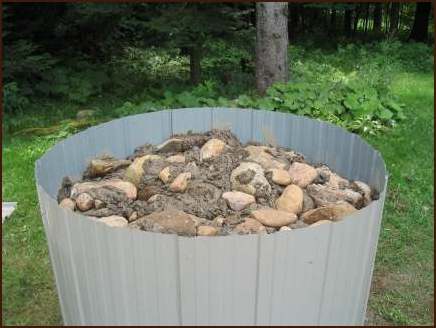
Then I riveted together a 36" tall cylinder of the same steel siding we used for the house and tapconned it to the concrete. Then I filled it with stone and concrete . . . a lot of stone and concrete. That was the hardest and least pleasant part of the whole project. I had to be careful not to let rocks bump the steel too hard because it is very thin and dents easily. A rustic stone or brick shell would have been more attractive than this steel version, but I am more comfortable working in steel and besides, this was a lot less work. |
|
|
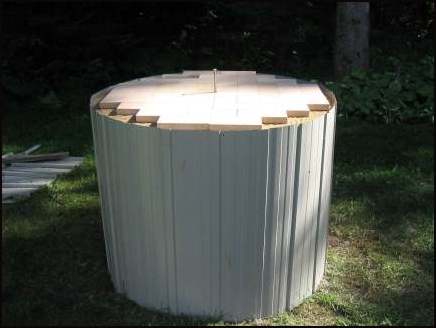
Next, I poured a roughly 4" thick pad on the rubble 'foundation'. My
friend Tim had built a different type of brick oven a few years ago and,
during a consultation session over beers before I started the project,
strongly recommended insulating the floor of the oven, which Russell
Jeavons hadn't mentioned. But Tim said in our winter climate all that cold
concrete would suck the heat out of the oven too fast.
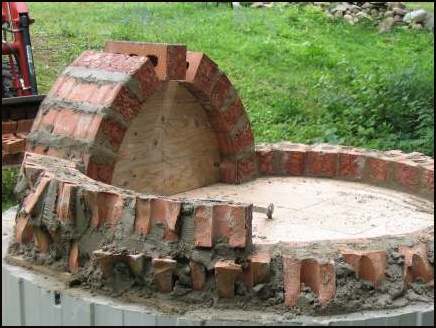
So I used a mixture of 30% vermiculite block fill in the concrete for the pad under the oven floor. I used straight concrete for the rim around the outside of the pad where the oven dome would rest. At right you can see the pad with the firebrick splits laid out on it to form the oven floor. In the centre of the floor you can see a pin in the hole used to locate the dome brick placing arm. See below. |
|
Having never laid a brick in my life, I plunged right in, employing what I
refer to as the 'blunder method', which is really a semi-controlled form
of winging it that I have used for all my projects. The oven is built from
standard house bricks, the cheapest ones I could find. A couple of things
of interest in this pic:
|
|
|
By using the steel rod and angle iron guide the dome goes up brick by
brick and course by course in a surprisingly nifty way. Some of those who
came by to see how the oven was coming along were actually duped into
thinking I knew what I was doing. At a certain point you can't place
anymore bricks because they'll fall right back out due to gravity, but
you'd be surprised how high you can go before they do. The hole at the top
I couldn't fill using the arm as a guide was only 19" in diameter.
That circular thing in the door opening is a plywood disk with a mortar dome on it matching the curvature of the inside of the brick dome. It was held up under the remaining hole with wood framed rectangles I had to custom make. Once in position, I placed the remaining bricks from the top. Then I plastered the whole dome with mortar to fill gaps left by the jagged broken bricks. |
|
|
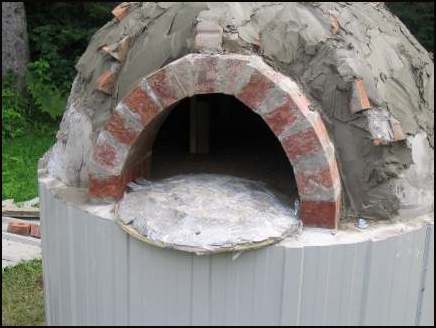
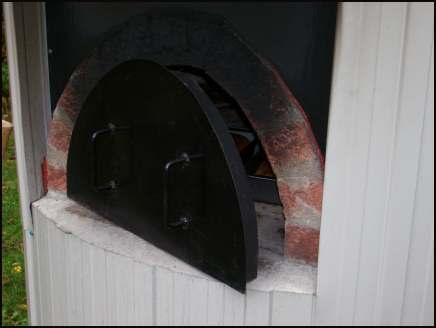
A fabricated 3/16" steel sheet was cut to match the profile of the
door arch. Since this oven has no chimney, I needed a more robust material
than the steel siding to take the heat over the door where the exhaust
exits. I formed another cylinder of steel siding and tapconned it to the
oven floor pad and riveted it to the steel sheet above the arch.
Finally, I filled the remaining space between the brick dome and upper cylinder with vermiculite block fill to insulate the oven, and capped it with a sheet steel lid. Observers were disappointed that the dome wouldn't be visible. It is a shame but this is a case in which function had to trump form. |
|
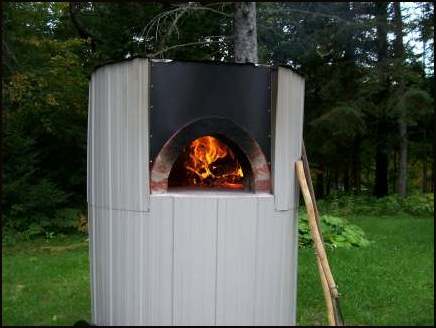
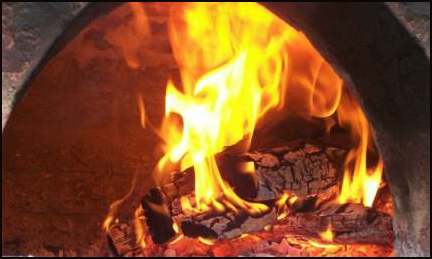
The idea is to build a big fire in the oven and let the heat soak into the
brick mass. It takes about two hours to heat the oven. When fully heated
the black carbon that forms inside when you start the fire has completely
burned off. There are two ways to use the oven.
|
|
|
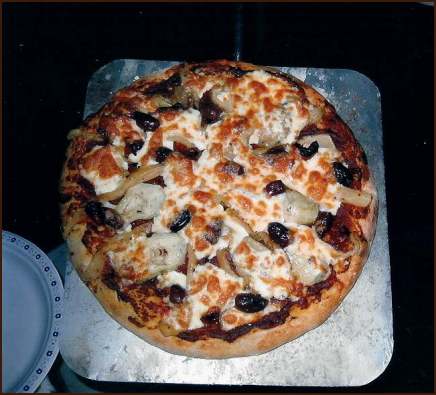
Here is a pizza just as it came out of the oven during the pizza party we
hosted when the oven was first finished. There were almost twenty of us
and it was an enjoyable evening, standing around outside sampling each one
of many pizzas made from an array of ingredients brought by the guests.
Heck, it may be worth building a brick oven just for the party potential.
I have found out that the sheet metal thing I made for handling pizzas in and out of the oven is called a peel. When the fire is right a pizza takes about five minutes to cook. |
|
|
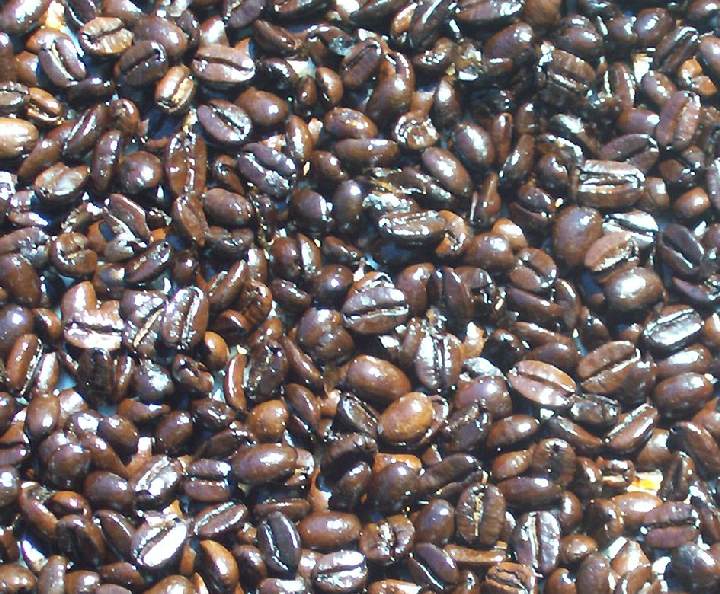
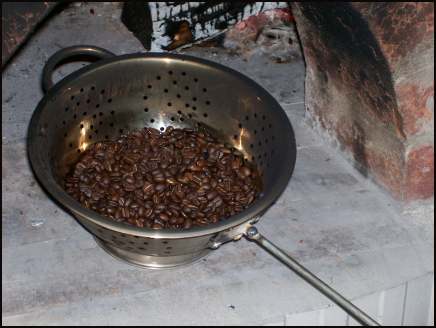
One experiment I had been keen to try was roasting coffee in the oven.
Some people roast coffee with an electrical device like a hot air popcorn
popper, but that would use too much electricity for our situation. After
my first roaster design failed miserably, I tried a stainless steel
colander with a long handle. It worked perfectly, although you have to
keep shuffling it constantly and watch closely because the difference
between light roast, dark roast and burnt is just a few moments at the
critical time.
I'm pretty pleased about this because we now buy organic, shade grown, fair trade coffee fifty pounds at a time for under $4 a pound including shipping compared to $15 per pound for roasted store-bought coffee. I am especially pleased because the resulting coffee is delicious. |
|
|
Freshly roasted coffee in the sun, just after it stopped
smoking, but before it was fully cooled. |
|
| The door is hollow, 2" thick and filled with vermiculite before the last part was welded up. The handles never get too hot to touch. I'll have to make a bracket on the side of the oven for it to sit in when not in use. |
|
|
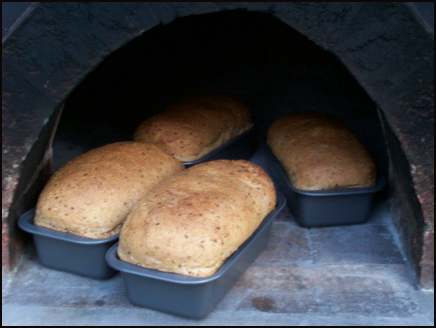
Here are some loaves coming out of the oven. These are 50/50 stone ground
white and whole wheat with flax and sesame seeds. After cooking pizza and
removing all the coals in preparation for baking, I've had to wait while
the oven cools down from 600°F.
I've been pushing advanced wood heating technology for 25 years, so it seems a little odd to go backward about 2000 years for this brick oven. On the other hand, once the fire is going well there is very little if any smoke and I've been pleasantly surprised at how little firewood it uses – roughly a wheelbarrow load for a whole baking cycle including coffee, pizza, focassia and bread. |
|
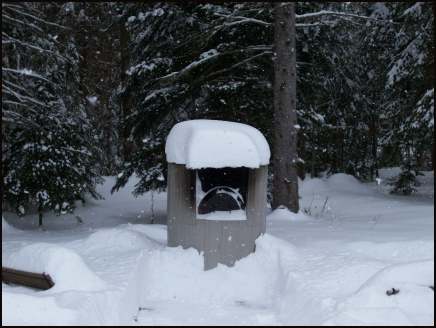
| I roast coffee and bake bread all year round in the oven. Here is a shot of the oven in December 2007 just before I cleared the snow off it. 90 minutes later I was roasting coffee. Baking day has now become an event that friends often join us for. We have done it on days as cold as -20°C. It hardly seems to make any difference in oven temperature. I suppose it cools down a little faster, but that has never been a problem. |
|