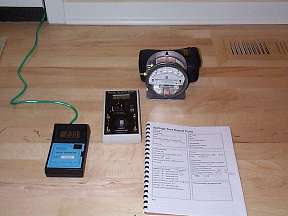
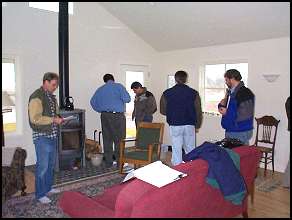
The spillage testResearch testing by various organizations has demonstrated the spillage resistance of most combustion appliance types, including fireplaces, wood stoves and furnaces. Once you know what level of house depressurization a particular appliance can tolerate without spilling, you can compare this level to the actual pressure environment of a house. Using the procedure set out here, you can test the house to find out how depressurized it can become when its exhaust ventilators are operating. The test results will tell you if the maximum house depressurization level exceeds the spillage resistance pressure of the appliance. At that point you can either choose a more spillage resistant hearth or install devices to maintain the house pressure within safe bounds. The general procedure* for the pressure test is to close and latch all exterior doors, windows and other openings to simulate the house condition during cold weather. Then, various exhaust ventilators are turned on, the level of depressurization is measured, and is compared to the pressure limit for the appliance in question. The test is designed to reveal the pressure drop caused by exhaust systems only; it does not include a measurement of stack effect. This is because stack effect is entirely dependent on temperature difference. If you want to find out the net influence of exhaust systems and stack effect on chimney performance for the day of the test, measure chimney draft while the exhaust systems are operating. Be aware, however, that the level of chimney draft or stack effect in the house are highly variable, depending on temperature difference and wind effects. The test may be done at any outdoor temperature, but should only be done when there is little or no breeze; wind speed should not exceed 10 mph so that pressure fluctuations are minimized. * The procedure outlined here is intended to be used only as a system design and diagnostic tool. It is anticipated that regulatory authorities in some jurisdictions may adopt a standardized approach to house pressure testing in order to ensure safe combustion venting in new buildings. The use of the procedure set out here should be discontinued in favor of a standardized approach when such is available. Spillage test proceduresYou can see a photo report here of a course on the spillage test, including the results for the two houses tested. 1. Assemble tools and equipment
2. Put house in heating season condition
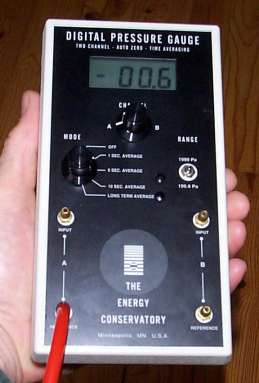
3. Set up the pressure gauge
4. Test furnace fan effects
5. Turn on exhaust equipment
6. Check for combustion spillage
7. Clean up
Table 5. Depressurization limits based on venting system design
Note: This table is adapted from the Canadian General Standards Board standard CAN/CGSB 51.71 "The Spillage Test". As more research is conducted and various jurisdictions codify the requirements, slightly different pressure limits may be chosen. Therefore, the figures in this table should be used as an interim guideline, not as the final word on the tolerance of various system types to house depressurization. * In laboratory research conducted after this table was developed it was found that a wood stove would spill carbon monoxide even at as little as 5 Pa room depressurization. This finding implies that most wood stoves should spill in relatively common circumstances, but actual field experience suggests otherwise. Closed door spillage due to house depressurization and elevated CO concentrations are rare as determined by other research studies. Analysing the results from the house pressure testIn most cases the house pressure test is used to confirm an anticipated result and to provide precise figures upon which to base recommendations and remedial measures. When dealing with an existing house, you already know if there is a venting problem, and by assessing the features of the combustion/venting system, you can get a sense of its vulnerability to spillage. A quick inspection of the house will probably indicate its relative airtightness; cues such as its size and design, and the presence of gaskets on doors and windows reveal the potential for tightness. The results of the pressure test do not necessarily dictate a specific course of action. In fact, for any given situation, there are usually optional strategies that could be followed. Here is an example to illustrate the process of interpreting test results and developing remedial measures: The pressure test of a new house that is not yet occupied shows that it can be depressurized 9 Pa when all exhaust systems are operating. The most spillage-susceptible appliance is an EPA certified factory-built fireplace with a straight chimney enclosed within the house envelope. The test is being conducted to determine if a powered make-up air supply is required for safe venting of the fireplace. The testing technician decides that it is extremely unlikely that the kitchen exhaust, two bathroom exhausts, the clothes dryer and central vacuum would all run at the same time. The practical maximum depressurization level is usually considered to be achieved with the two largest exhaust systems operating; in this case, the kitchen exhaust and the clothes dryer. The pressure test revealed that, with the two largest exhausts operating, the depressurization level was 7 Pa. The technician also realizes that this particular fireplace is in the most spillage-resistant category of natural firewood-burning appliances and it is vented through an inside chimney. The figures in Table 5, advanced wood heater category confirm, that this fireplace can tolerate 7 pa of intermittent depressurization. It is decided, therefore, that no make-up air system is necessary. The key point here is that some judgement must be used in the analysis of results. In any case, the technician must be prepared to explain and defend the analytical process underlying the judgement call. Where the practical maximum depressurization level (ie. the two largest exhausts operating) exceeds the pressure limit for the appliance in question, further investigation is warranted. Although the normal course of action would be to install a powered make-up air supply interlocked to the largest exhaust system(s), other options may be available. For example, if the largest exhaust is a hood-type range exhaust which the homeowner agrees is more powerful than necessary, its flow could be reduced slightly by blocking part of the inlet or outlet. This option would only be useful if the appliance pressure limit is exceeded by one or two Pa. Testing the viability of this option would be as simple as temporarily blocking part of the inlet during the house pressure test and recording the pressure change. After some experience with the house pressure test you will gain a feel for the cause and effect relationships involved. The test is just one of the tools available to the hearth/housing analyst in designing new systems and diagnosing problems with existing systems. Back to the Table of Contents |